DIY Clothespin Napkin Holder
Have you ever been distracted while you're organizing your home and cleaning out things you don't employ anymore, and of a sudden found yourself struck by unexpected creative inspiration? I find that this happens to me sometimes with random household items that I wouldn't necessarily expect to utilise in DIY projects just that I of a sudden feel would brand awesome tools for creating something fun and unique. That's precisely what happened terminal week when I was cleaning out the laundry room and came across a pack of plain wouldn't clothespins that I forgot I had and had never opened. Rather than stashing them abroad again to collect dust and inevitably be forgotten again, I started thinking about how I might employ my DIY skills to give them a new lease on life. That's how this clothespin napkin holder came to be!
Once I'd created one napkin holder, I got a niggling flake obsessed with the idea and started thinking about how I could pigment and embellish more of them differently to suit different seasons, holidays, and occasions. By the fourth dimension I got around to make this lovely floral version for spring, my DIY friends had taken note and wanted to see how I fabricated the holders, so I opted to record the process so I could show them.
If you similar the idea besides, cheque out these footstep by step instructions complete with photos! If you lot'd rather follow along with a video tutorial, keep on scrolling and yous'll find one of those as well.
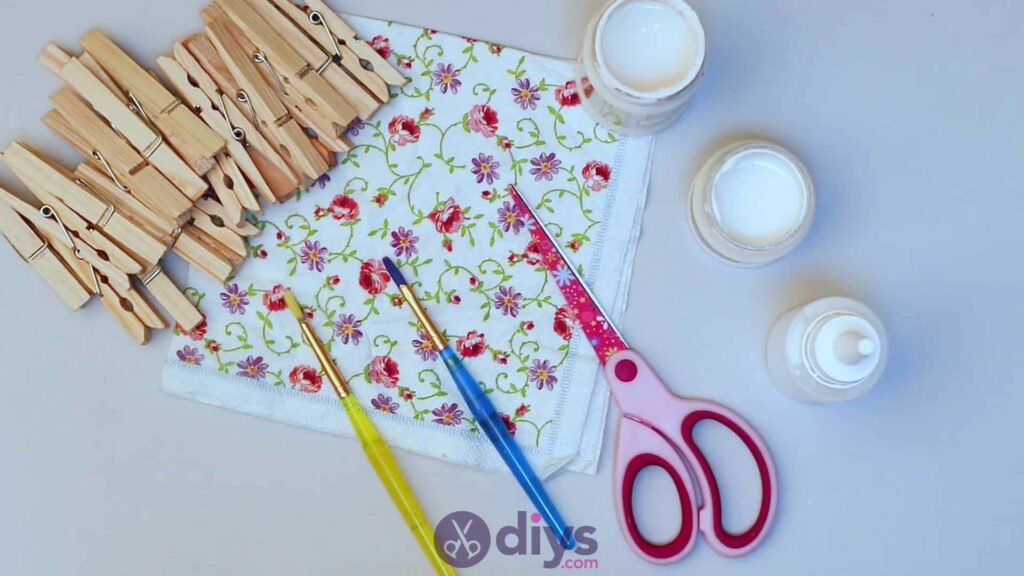
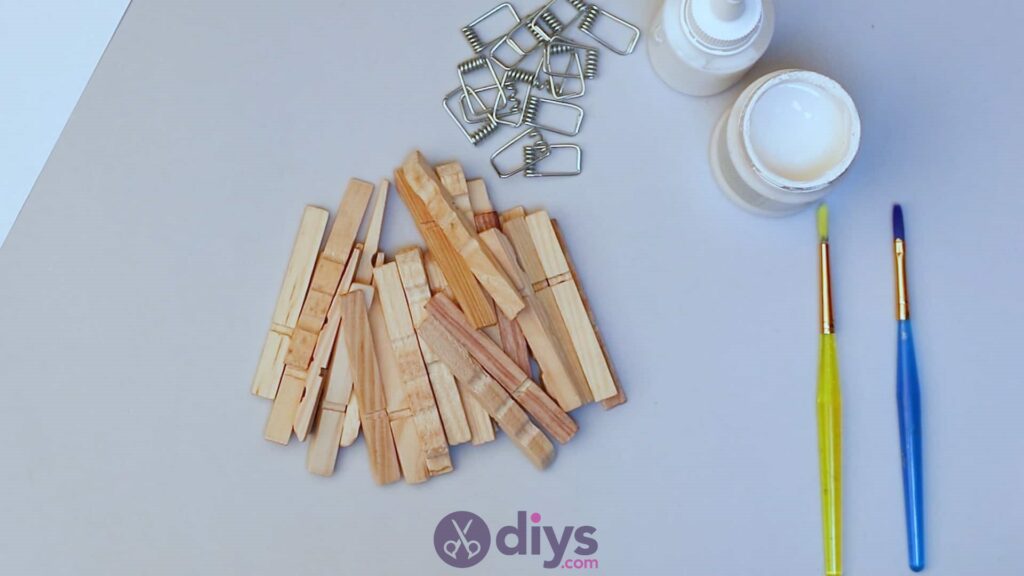
For this project, you lot'll need:
- Wooden clothespins (the clamping, spring loaded kind with two pieces, non the hold fashioned all-wooden ones)
- Forest mucilage
- White acrylic pigment (or whatsoever colour you prefer)
- Pigment castor
- Scissors
- Patterned napkin
- Decoupage glue (or white schoolhouse mucilage, slightly diluted)
Step 1:
Gather your materials!
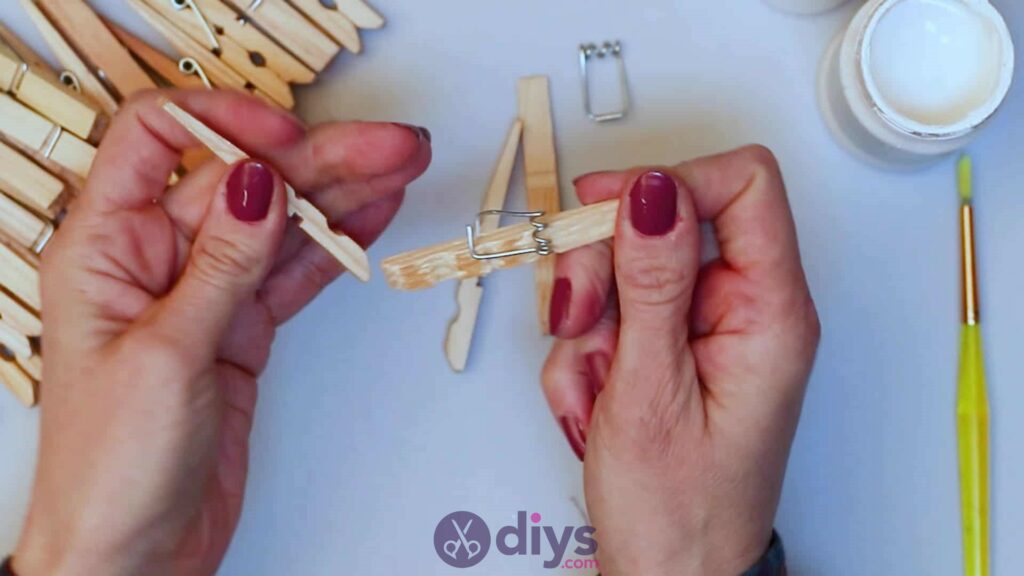
Footstep two:
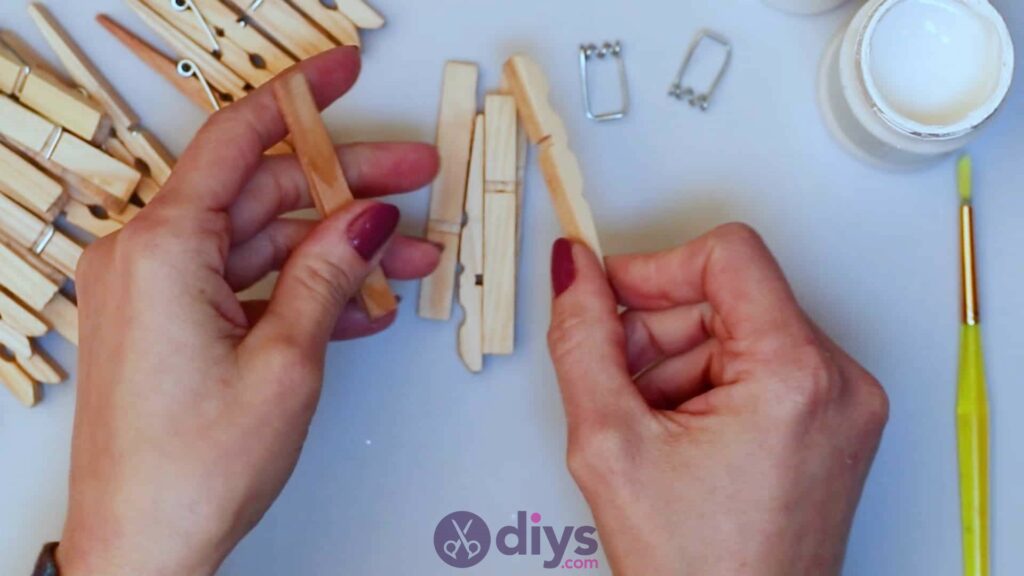
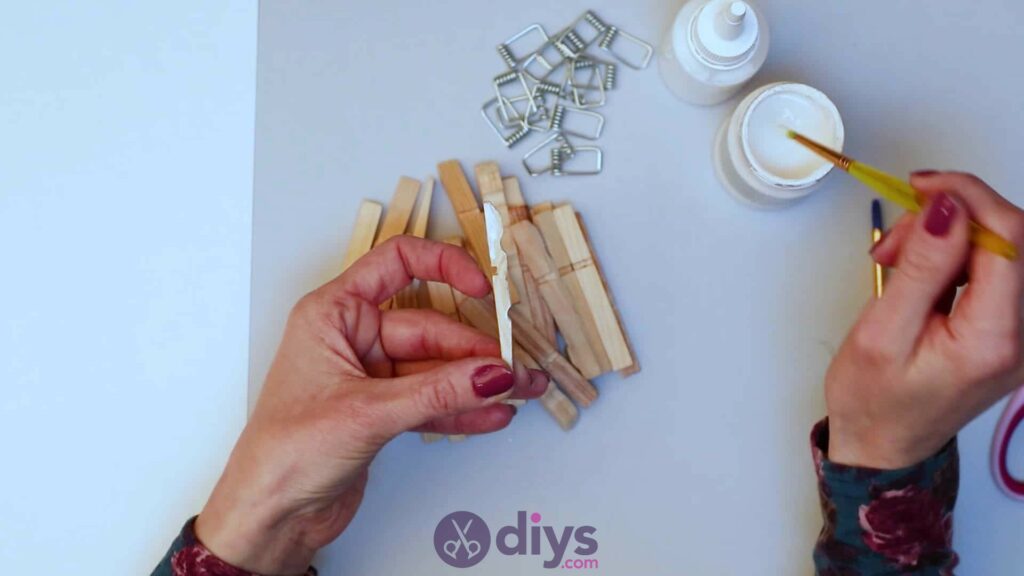
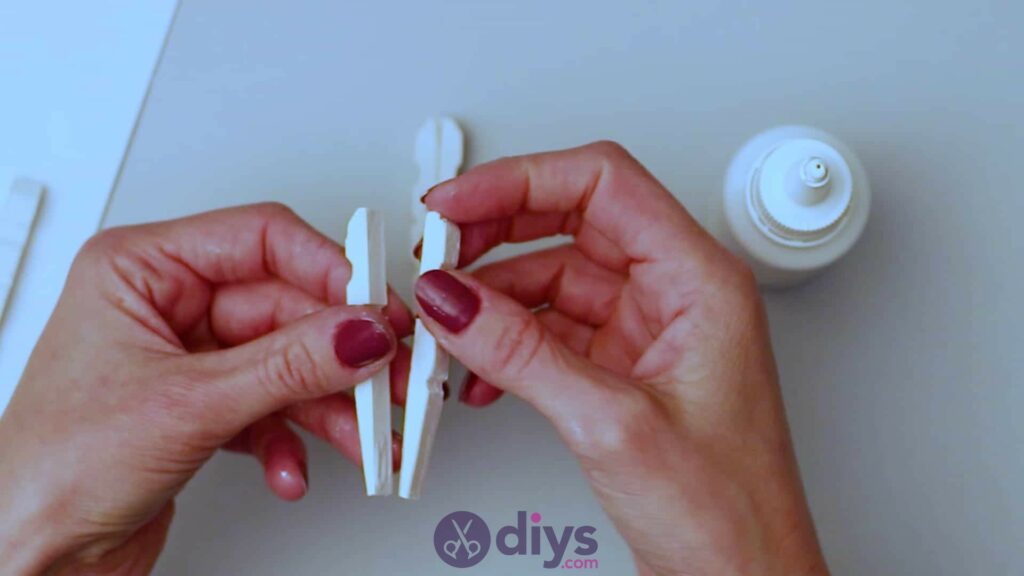
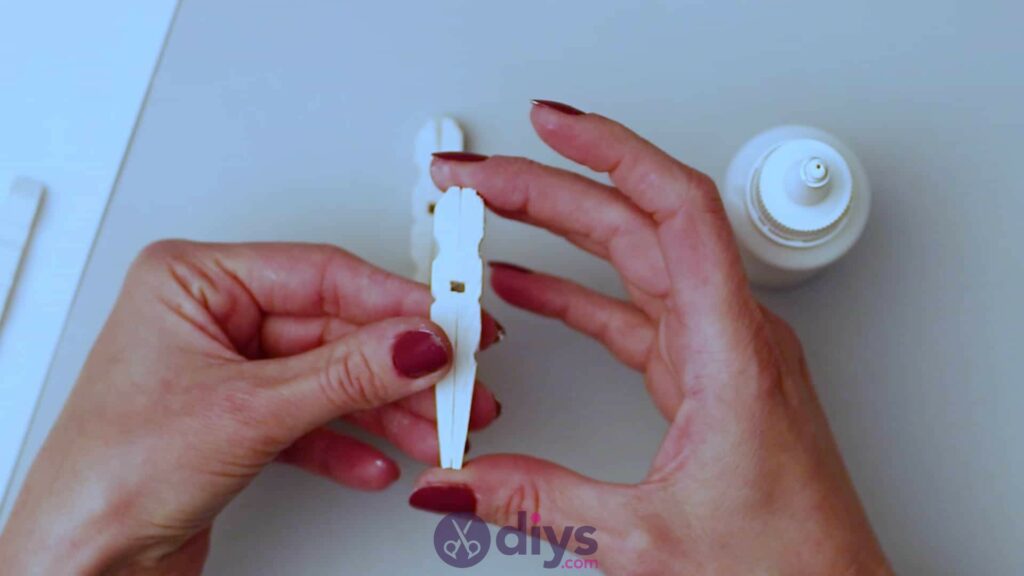
Gather nearly 32 plain wooden clothespins and have them apart! You lot tin can literally and quite easily just dismantle the pieces, giving you 2 wooden sides and a metal spring piece. Y'all'll fix the springs bated, since you don't need them for this projection, but I'd suggest hanging onto them rather than throwing them out; they can exist quite useful for other crafts some other time. What yous'll utilize here are the wooden sides that you remove from each whole clothespin, totalling 64 in total once you've taken apart your 32 pins. You can utilize more or less pins to make a napkin holder that's larger or smaller, but mine was perfectly sized for holding the average pack of regular sized square napkins folded triangularly for presentation, and these are the numbers I worked with.
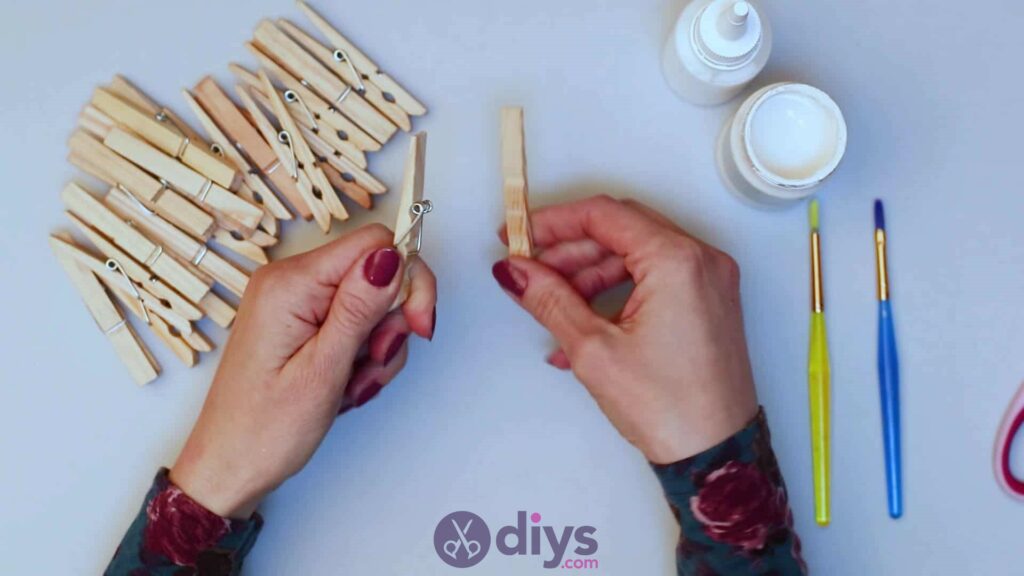

Step 3:
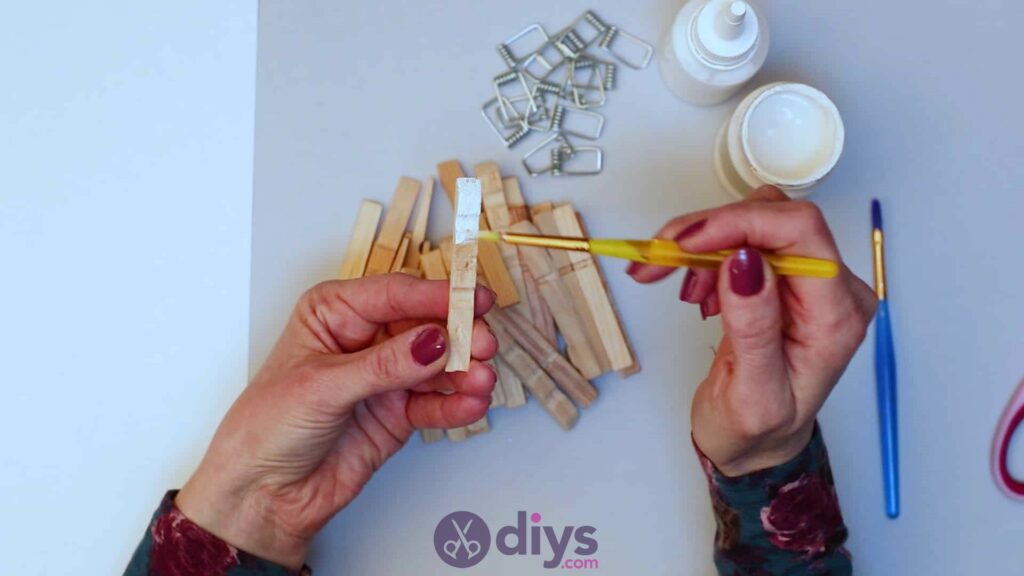
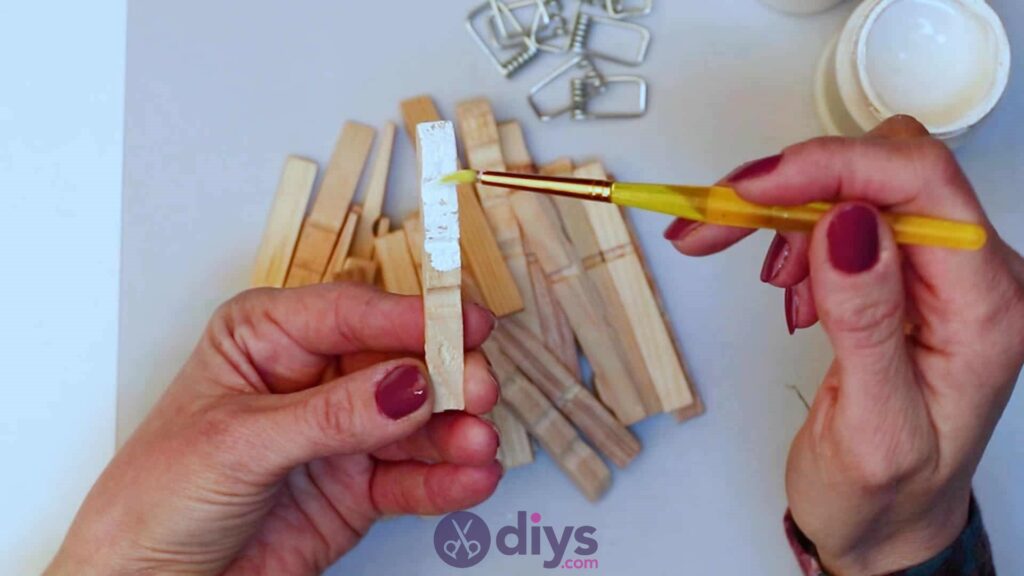
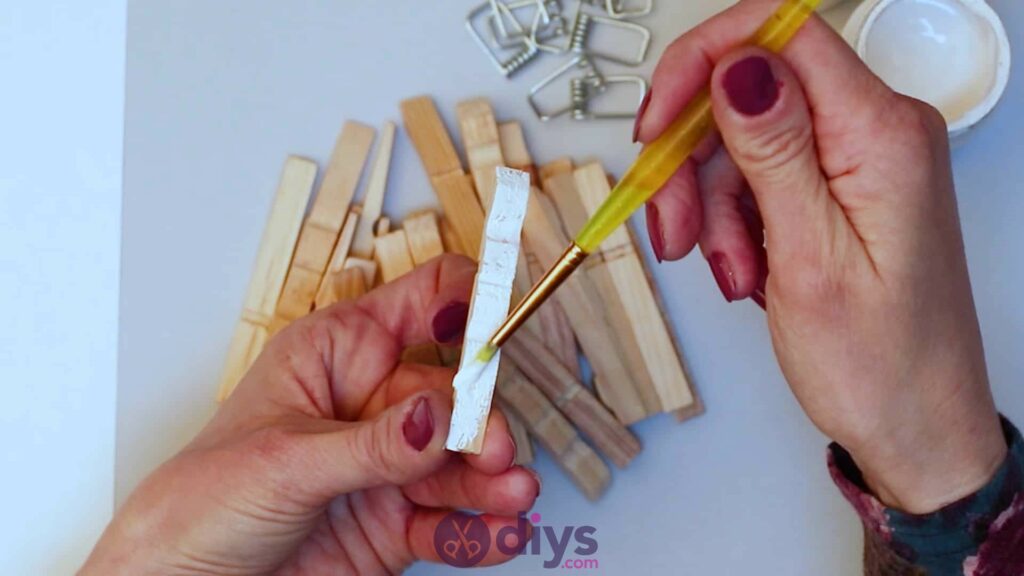
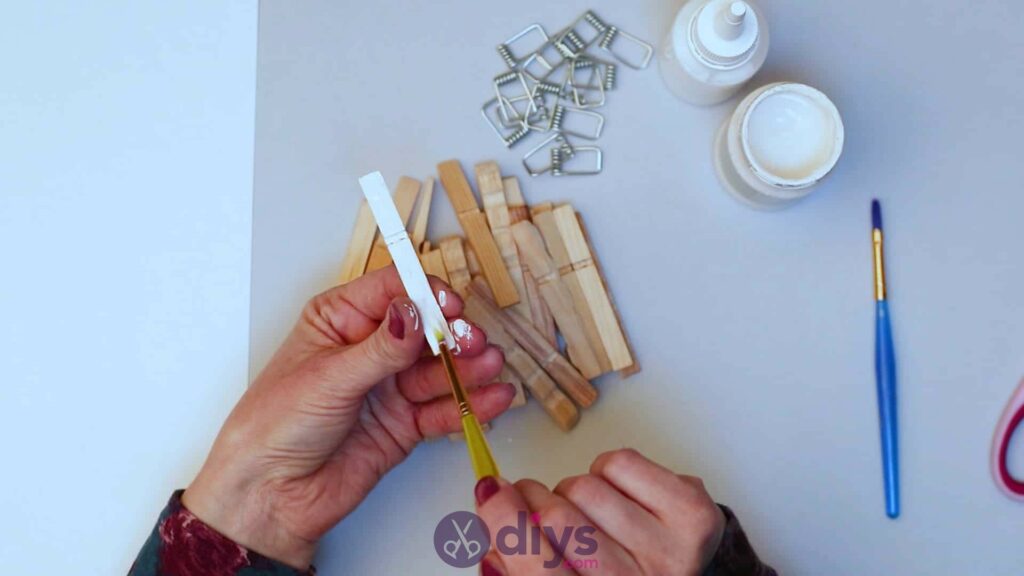
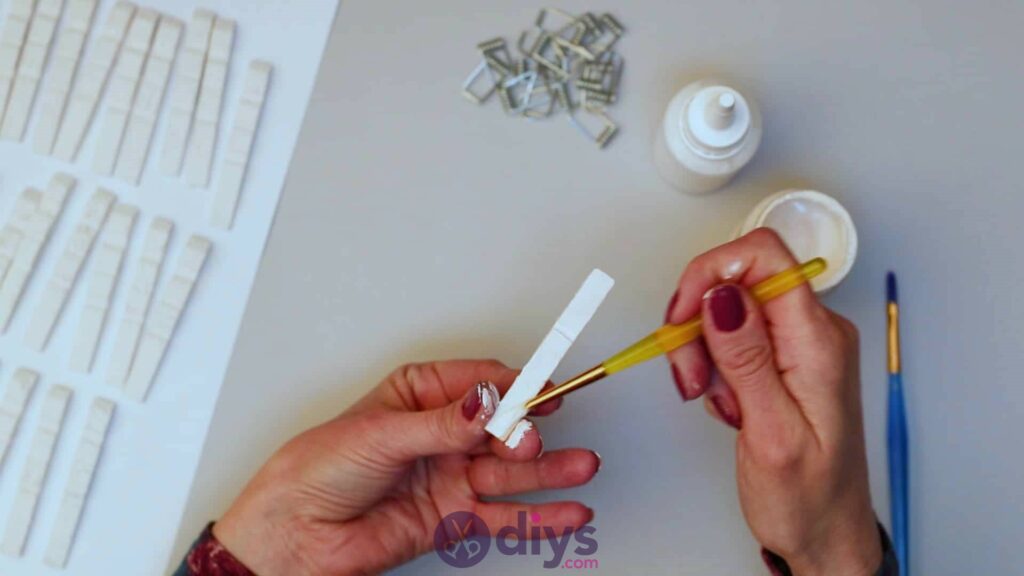
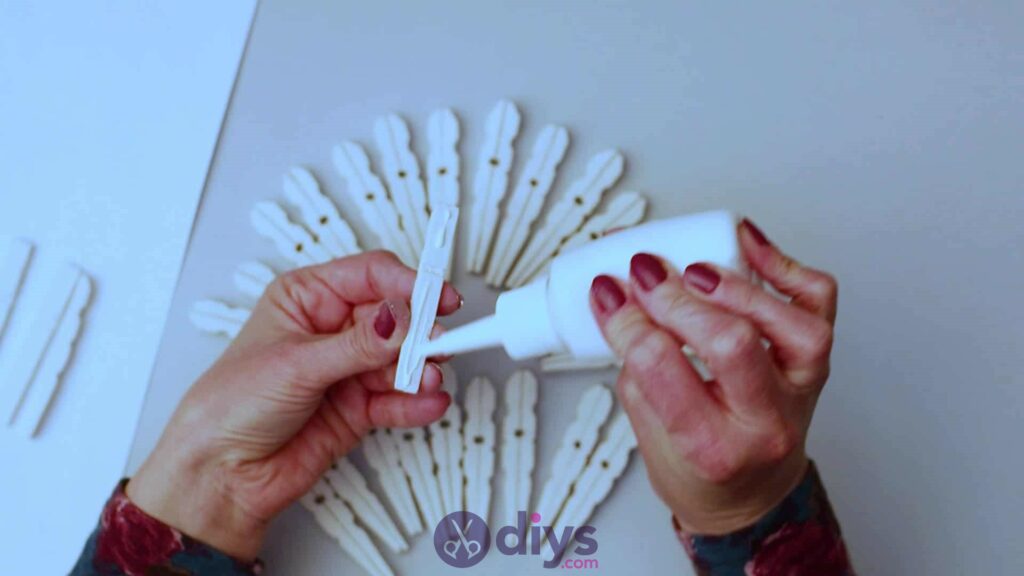
Utilize your paintbrush and coloured paint (I used white but you can apply another colour if you prefer) to pigment your wooden clothespin halves entirely, all the mode around and on all of their sides. Lay them out on a piece of paper, plastic, or other protective tarp to dry entirely.
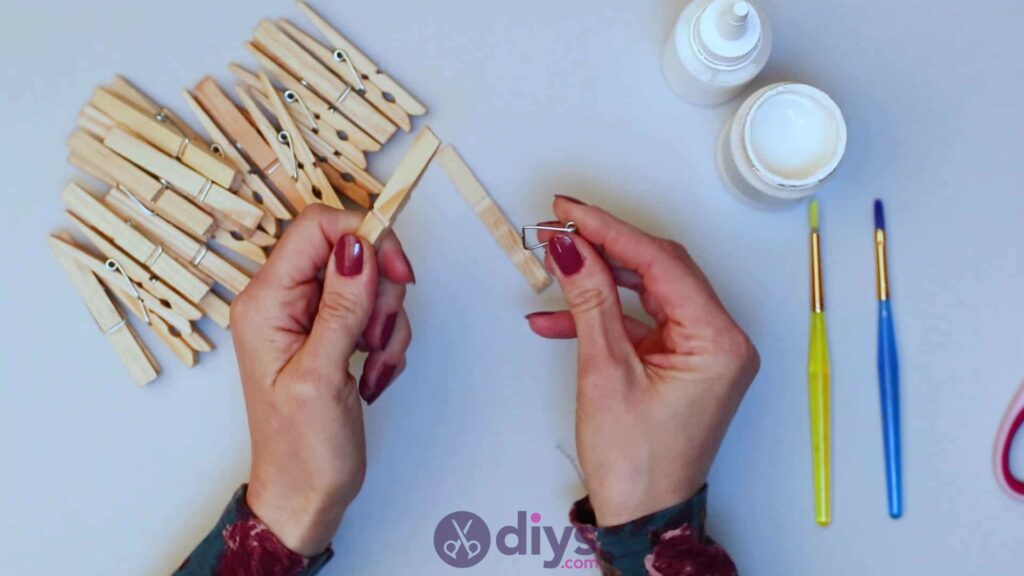
Pace 4:
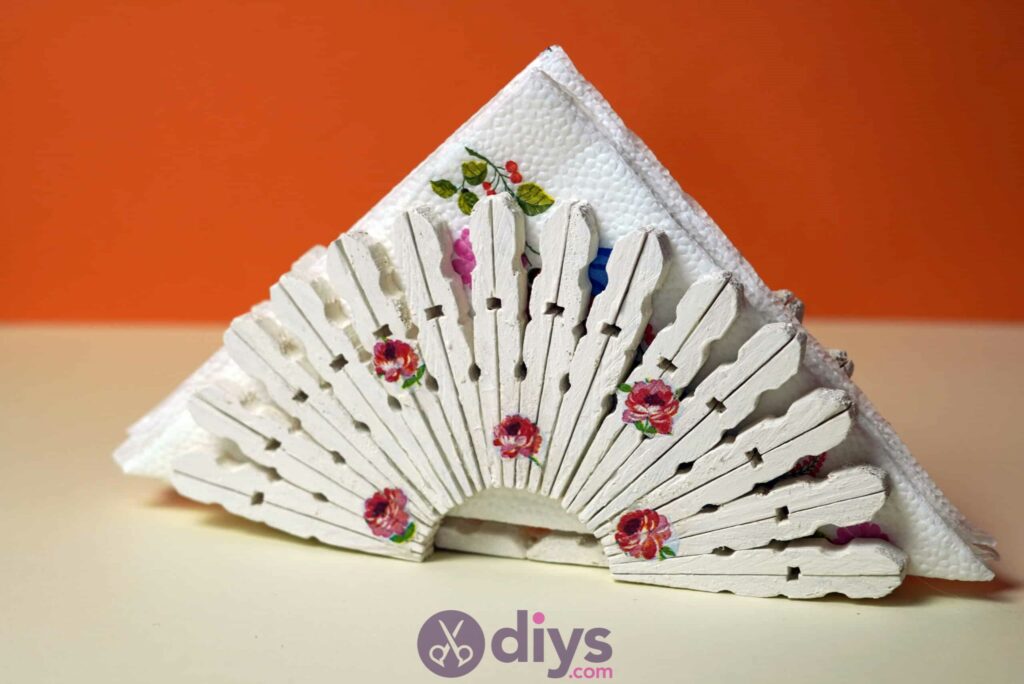
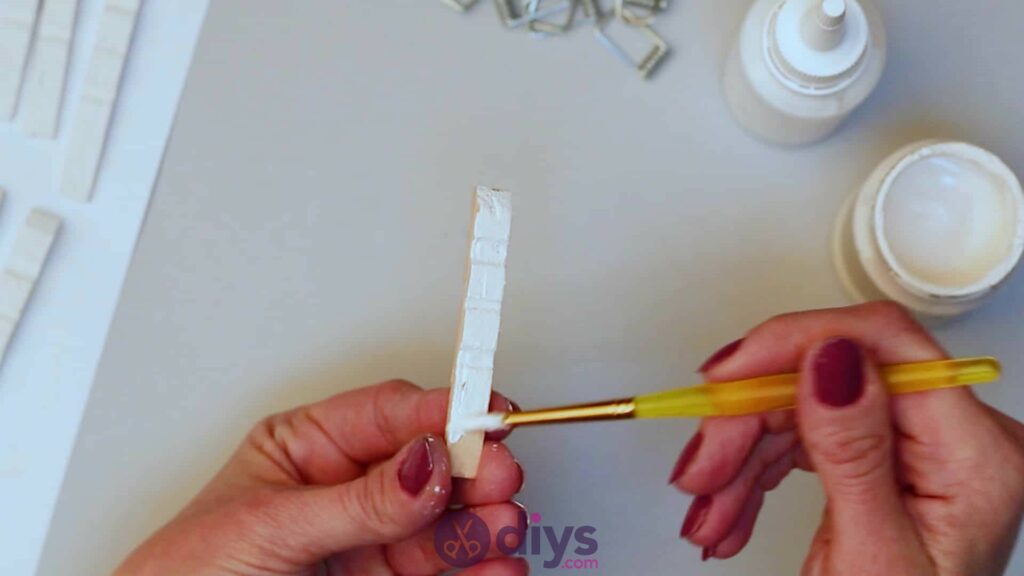
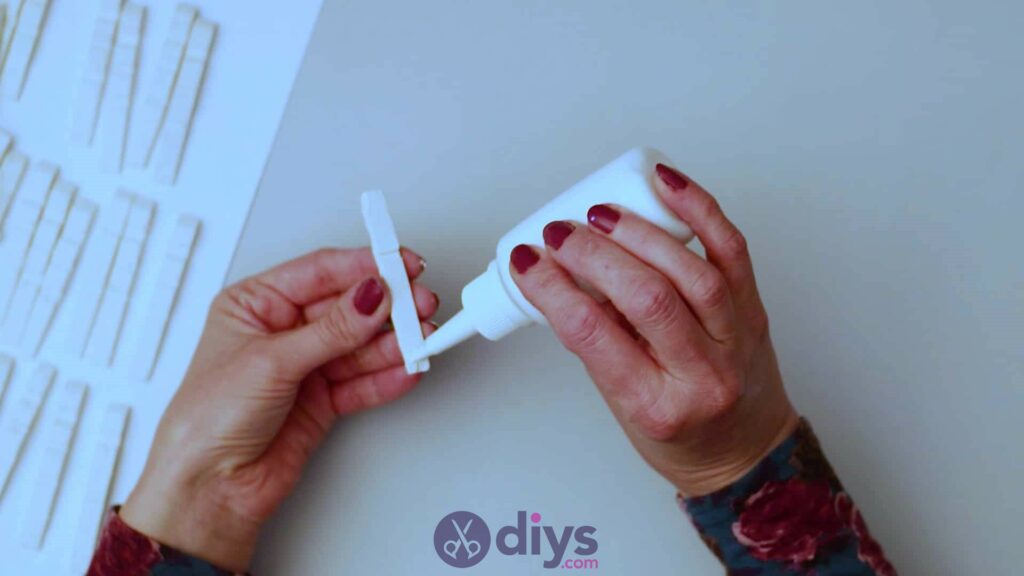
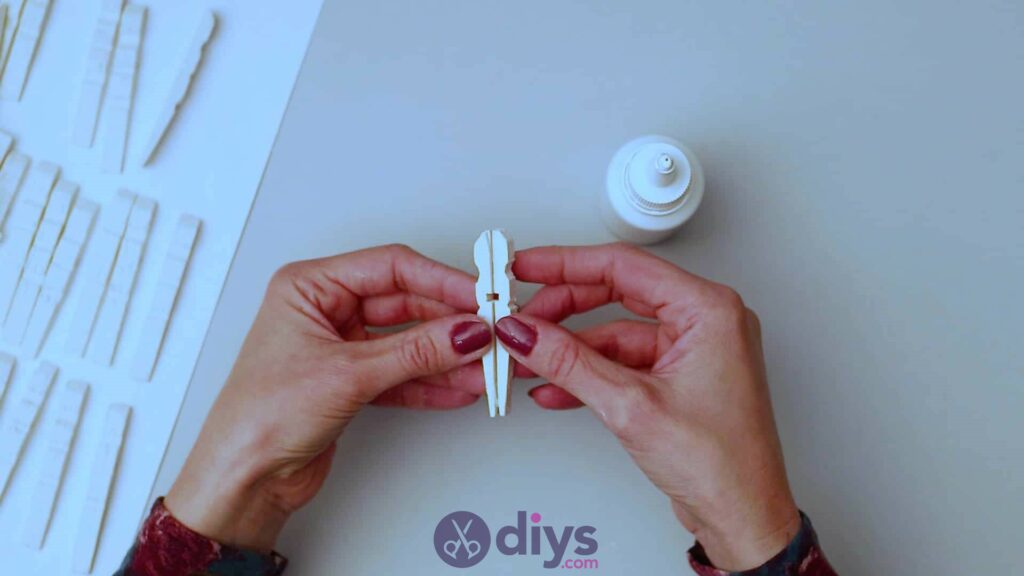
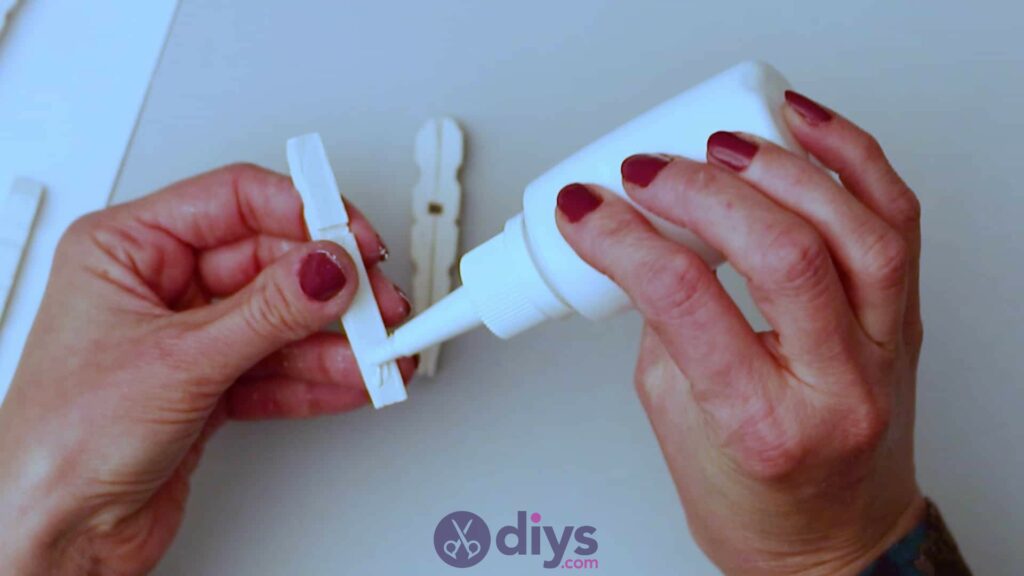
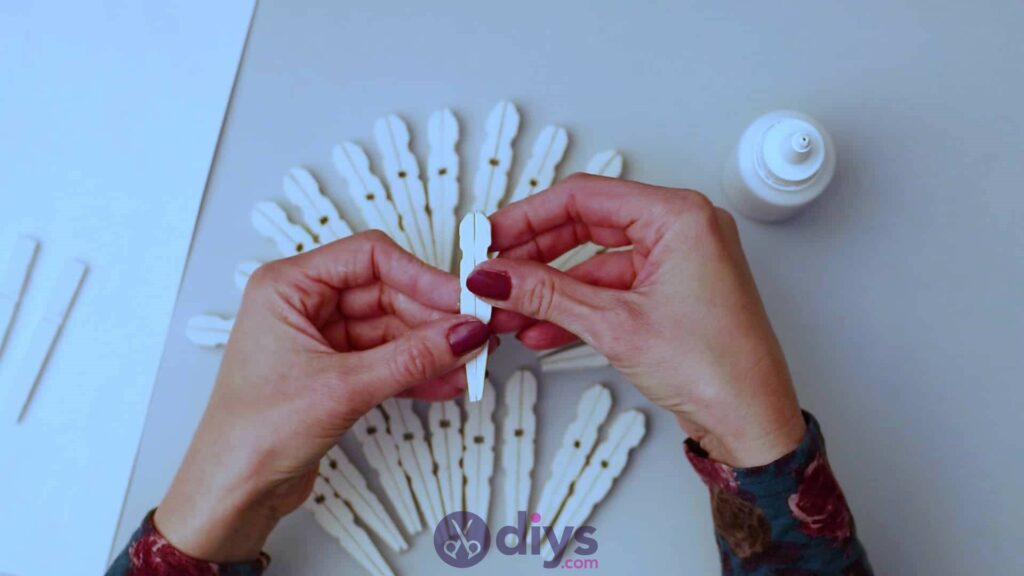
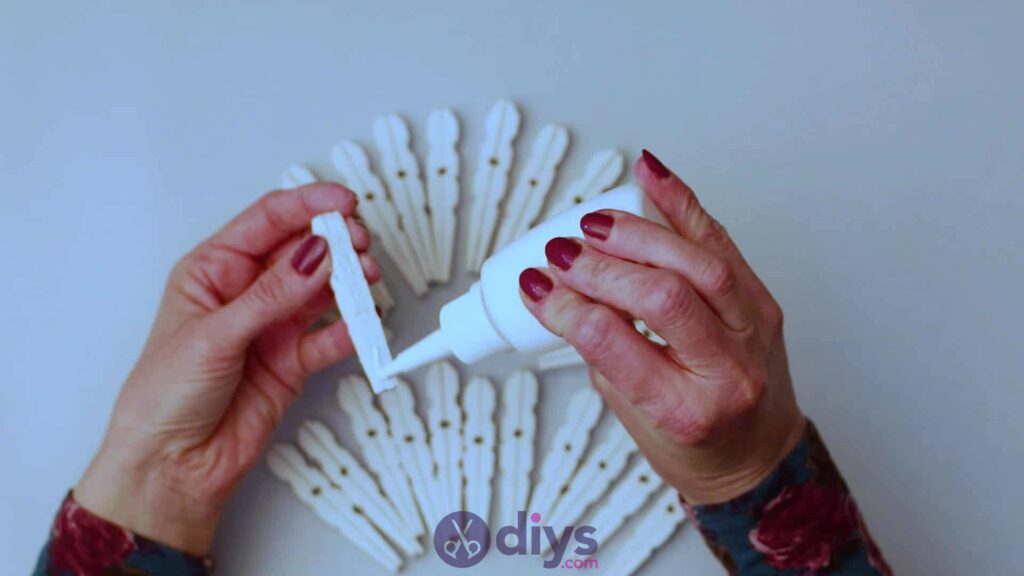
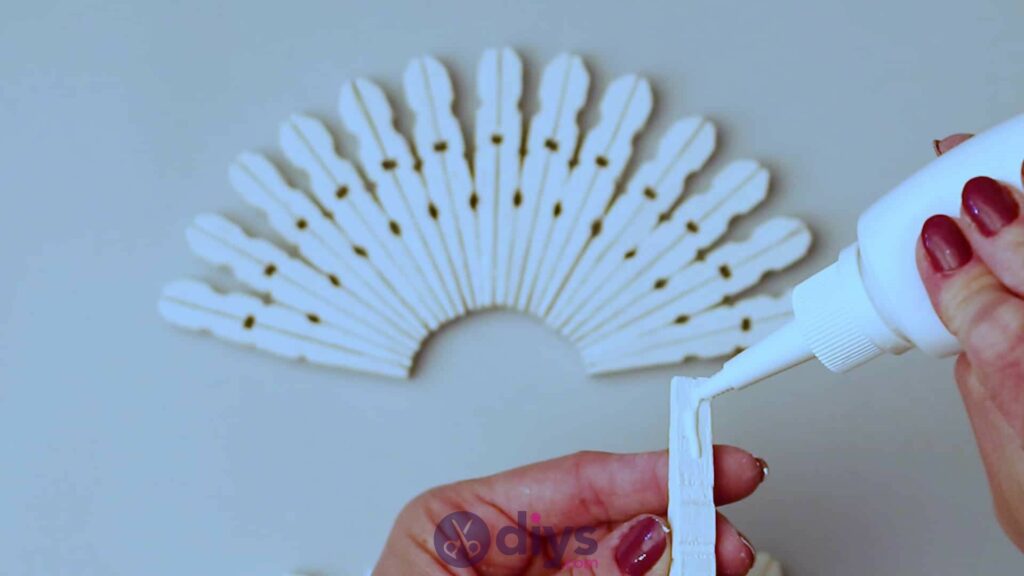
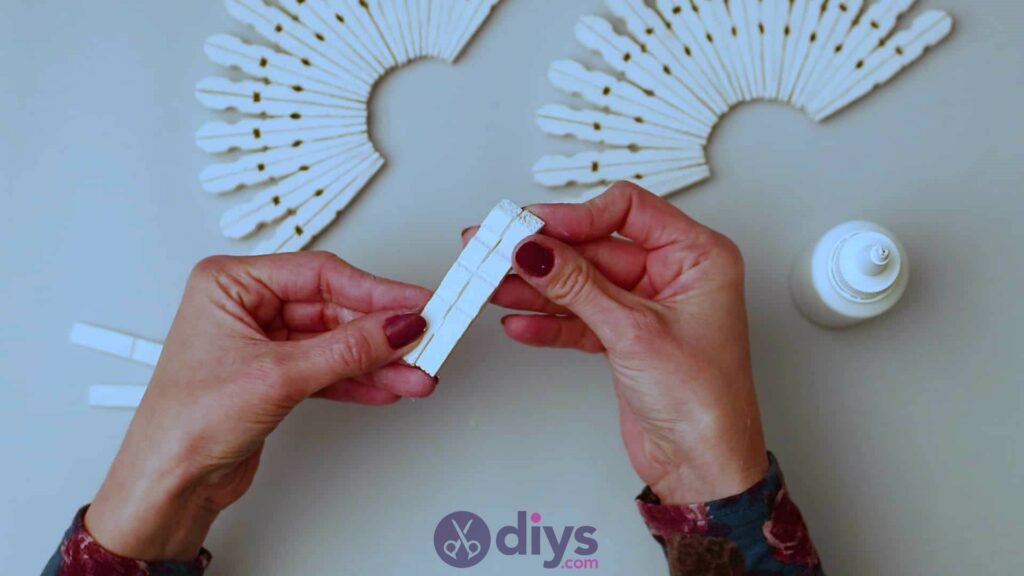
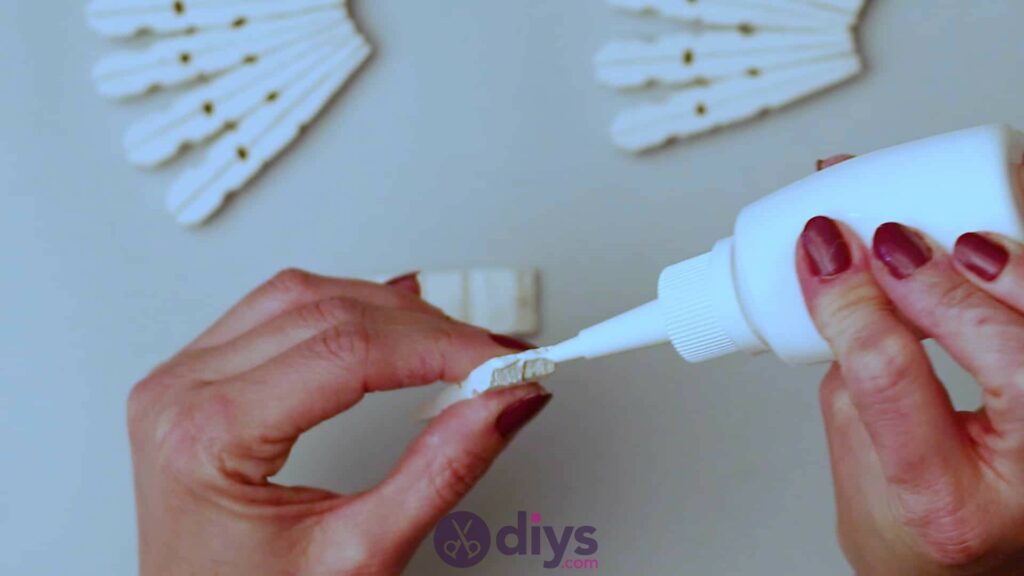
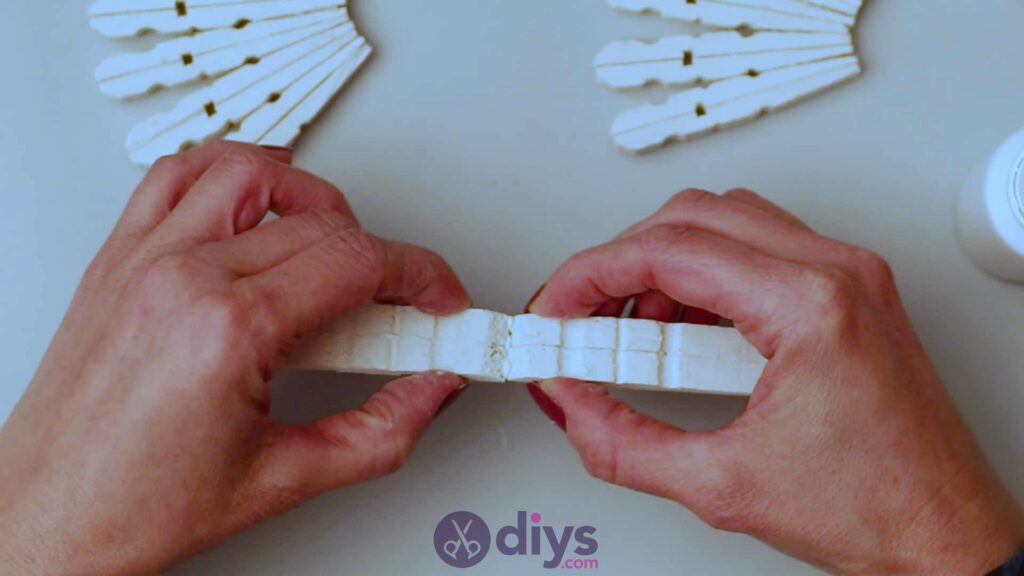
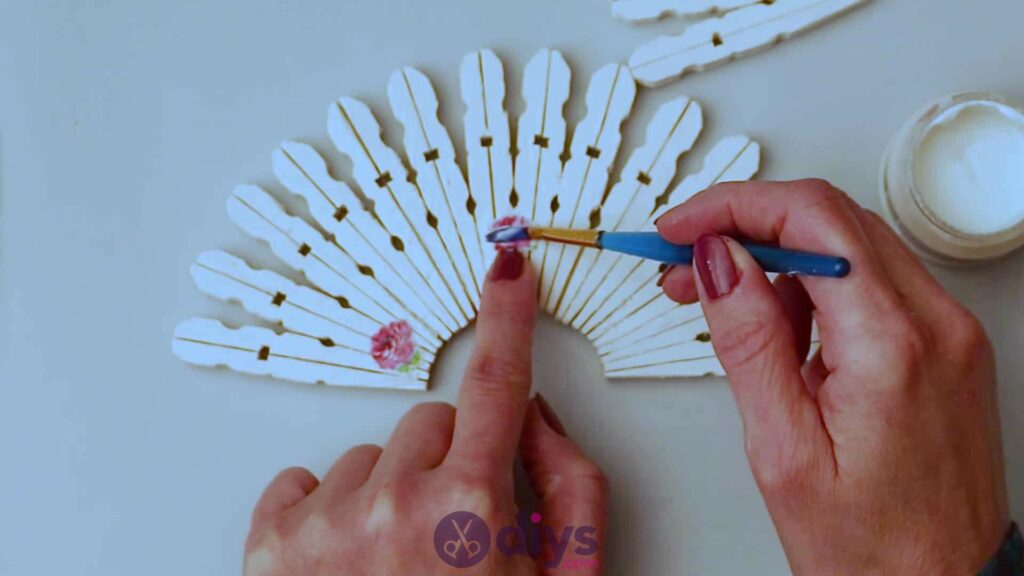
Now you'll create the tapered wooden shapes that will make up the pretty fanned sides of your napkin holder! Option upwards i dried wooden half and plough information technology so the flat side (the one that face outward initially, when the clothespin was whole, and doesn't take any ridges) faces towards you. Utilize gum on this apartment side, smoothing it all upwards and downwards the unabridged length of the clothespin. Next, have a second clothespin half and stick its flat side to the apartment side of the i you just covered in glue, making certain the edges of their summit and lesser ends sit evenly with each other. Prepare this newly paired shape aside until the gum dries and go along making more pairs. I made 28 inverted and double pieces in total, each glued back to back forth their flat sides. This gives you 14 shapes on each side when it comes to making the fanned pieces afterward.
Step 5:
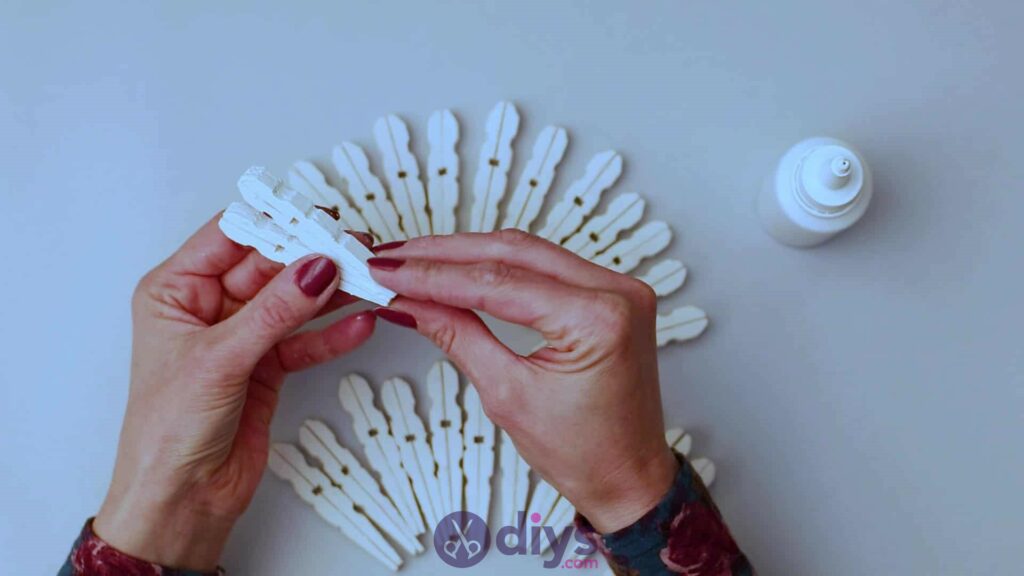
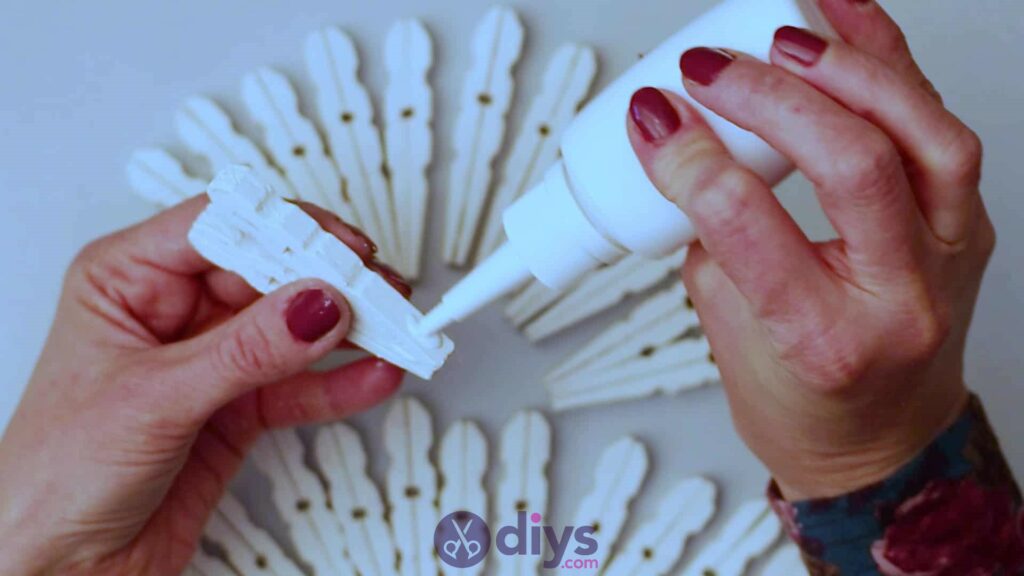
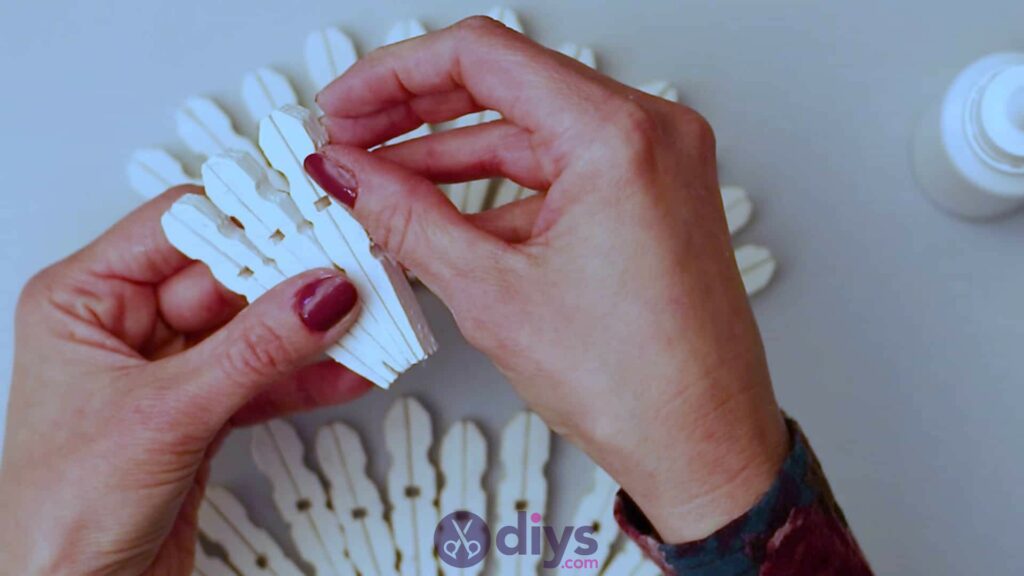
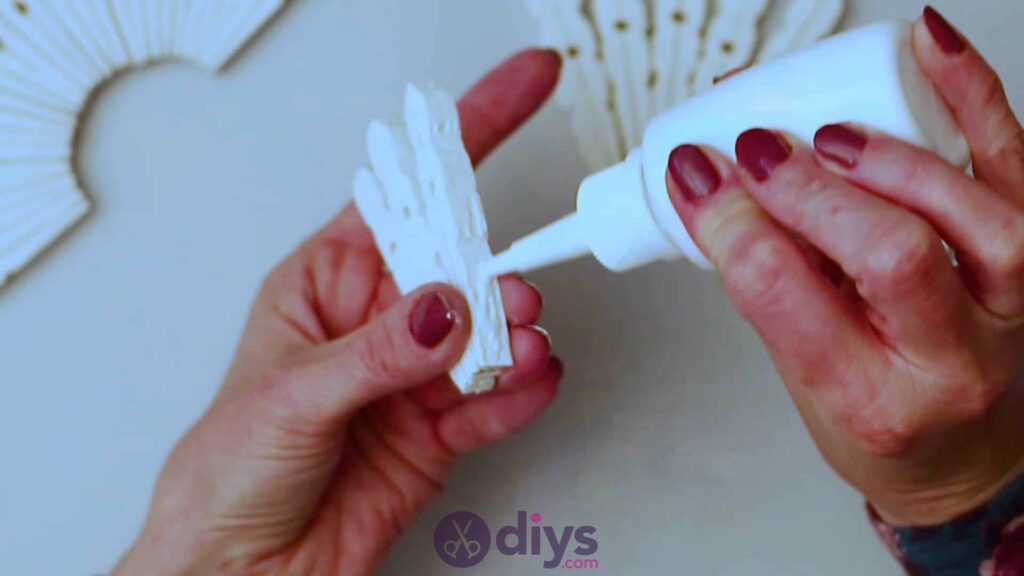
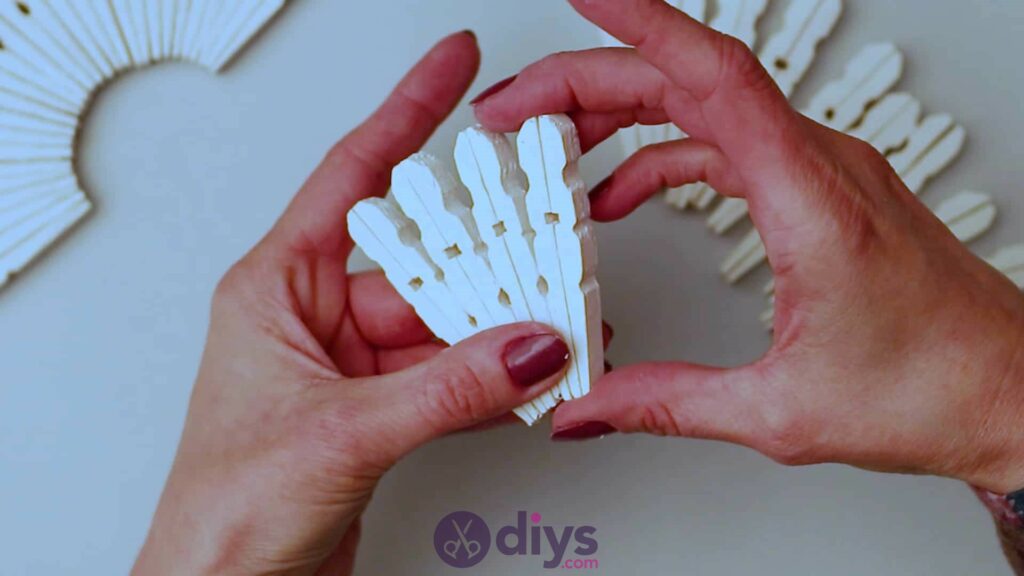
When your doubled shapes are dry out, pick upwards i and apply mucilage on the side of its tapered finish, on the "front end" of your righthand wooden clothespin half. You'll merely need to spread the gum from the bottom end up to where the first groove or ridge sits, considering that'southward the just surface that will sit flat against another piece and be required to stick; the height role with the ridges will fan out thanks to the increase at the pinnacle of the taper. Pick up a second paired piece and stick the apartment part of its lefthand tapered side to the part you but practical mucilage on, making sure the pointed ends line up evenly at their very edges. You'll see how you already have a widened and more rounded shape starting to class at the top ends. Now apply glue on the apartment tapered part of the righthand slice yous only stuck into place, and then stick a tertiary paired shaped in identify in the aforementioned way, lining its bottom border upward with that of the second ane you're sticking it to. Repeat this process until you have a semi-circular or fanned shape, with a little arch at the bottom center. I glued fourteen paired pieces into place side to side like this to get the size and shape I wanted. You tin cheque your work by setting the exposed flat edge of the very first piece you lot applied mucilage to on the lefthand side flat down on the table and checking whether the right side arches across far enough yet to also sit down flat on the tabletop.
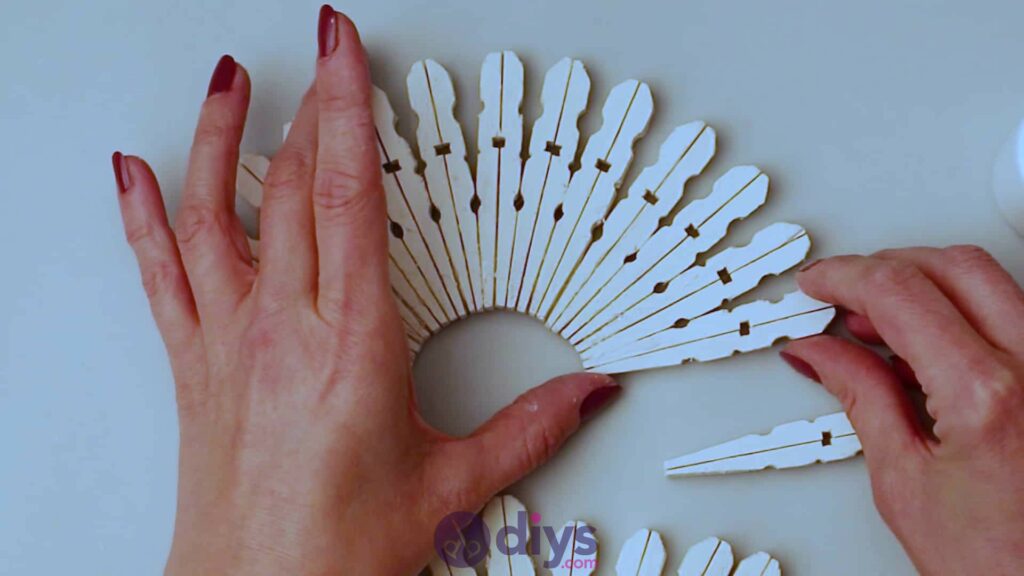
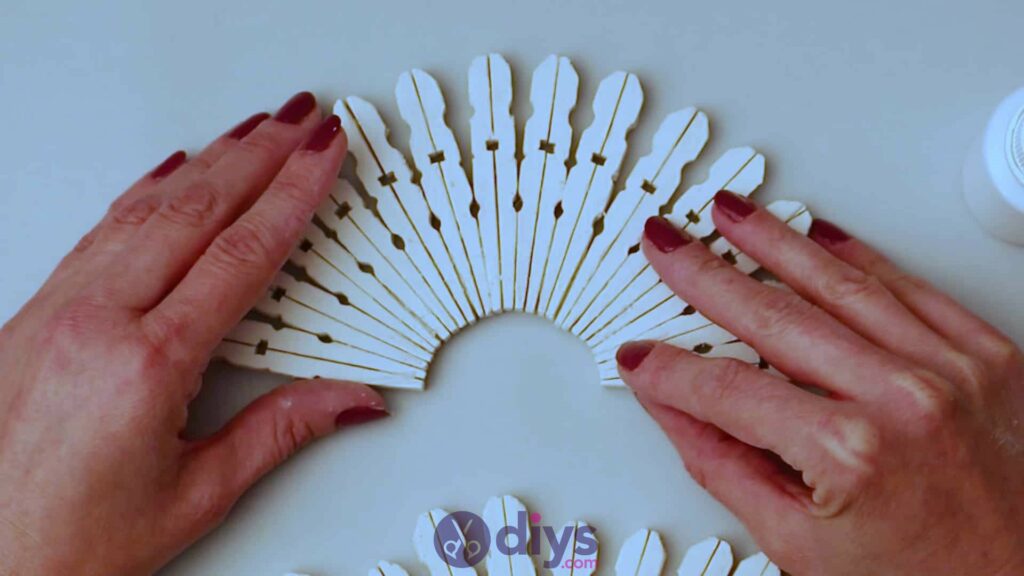
Step 6:
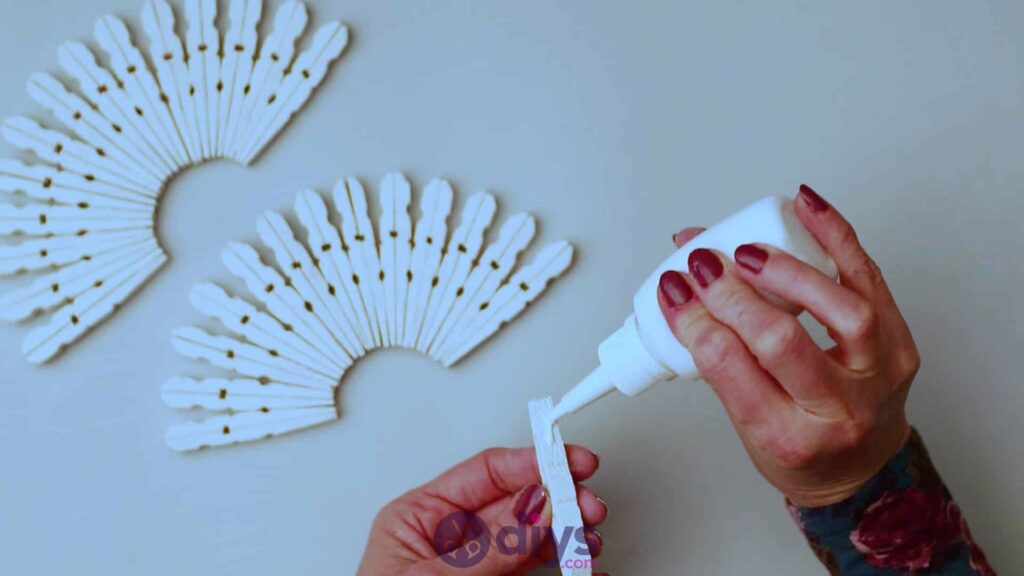
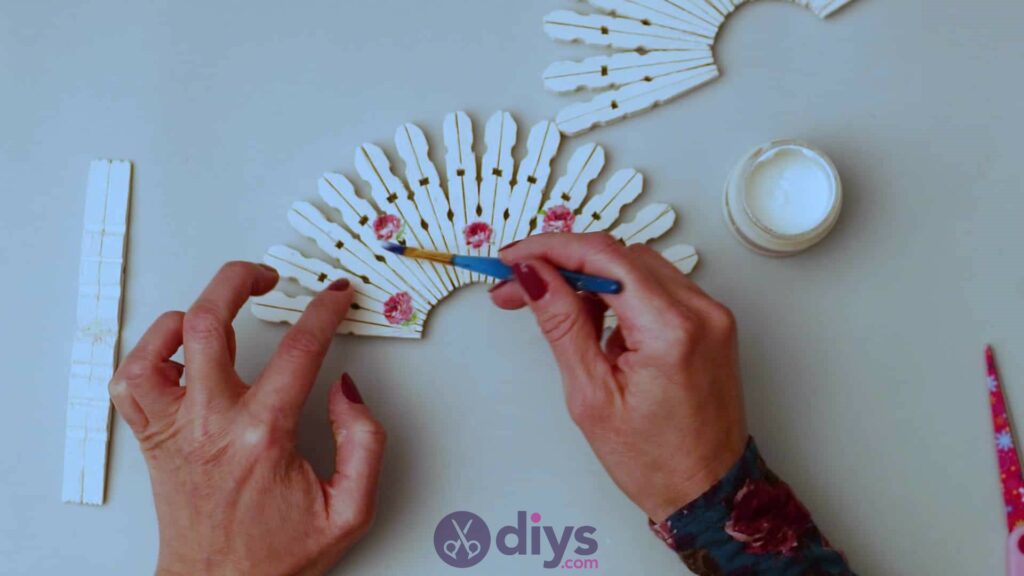
Repeat the entire process above in the same manner but to make a second fanned shape. This will exist the other side of your napkin holder. Use the same number of pieces so that your ii sides are the same size. When everything has dried, you'll havetwo fanned shapes.

Step vii:
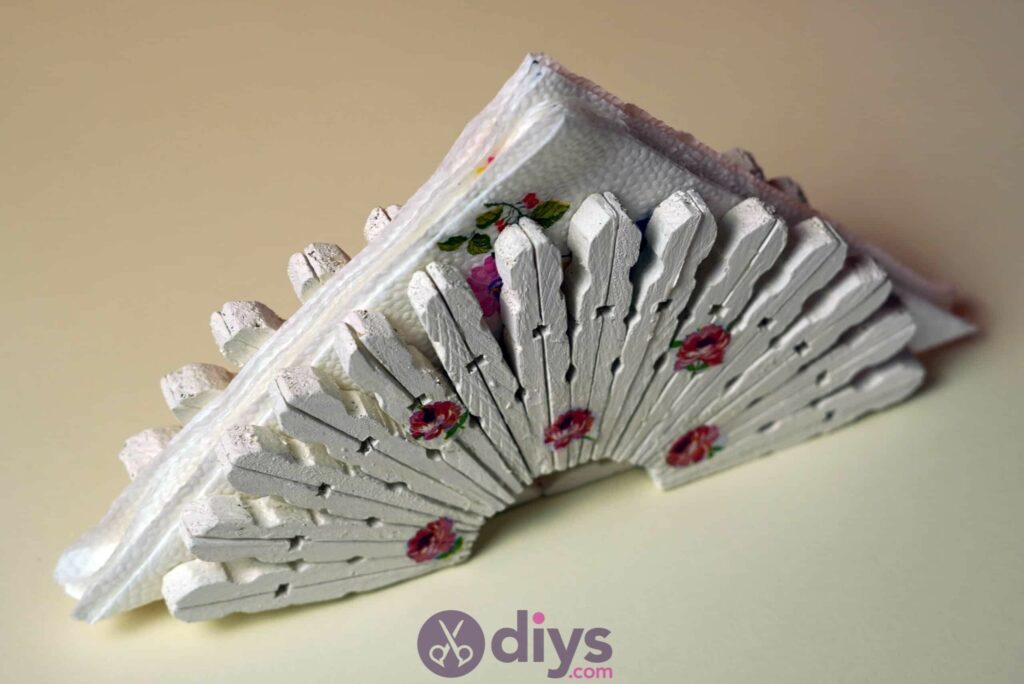
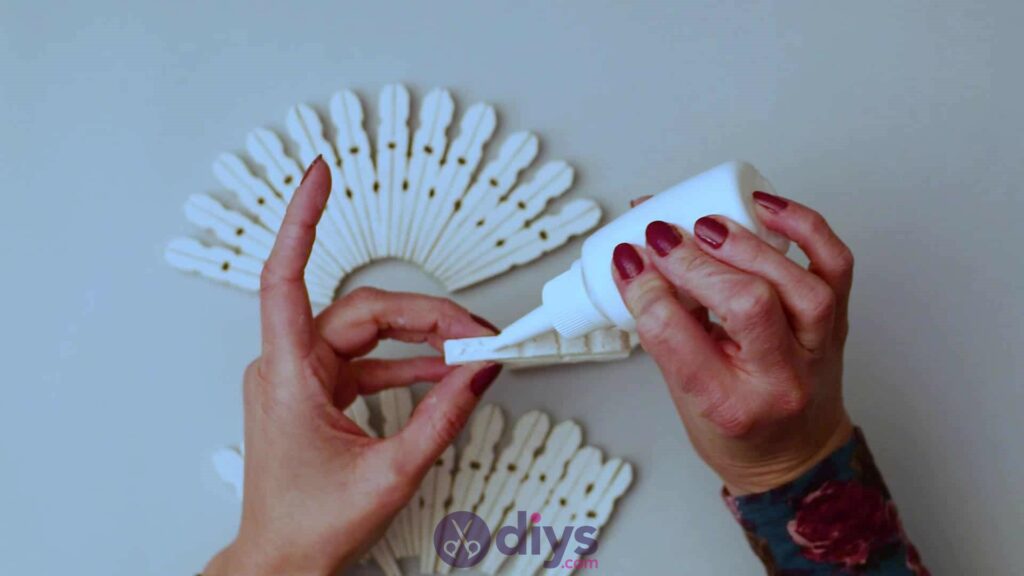
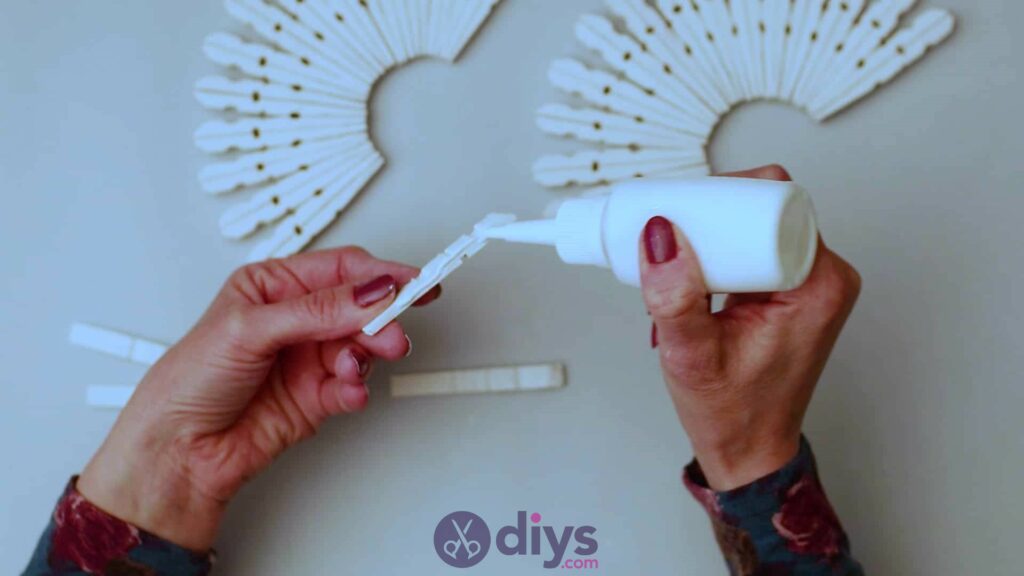
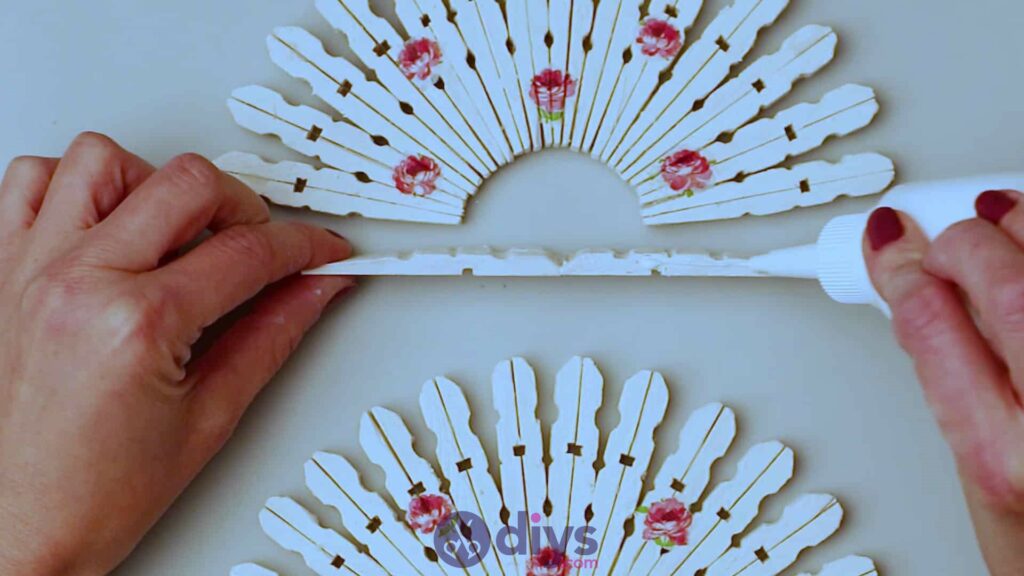
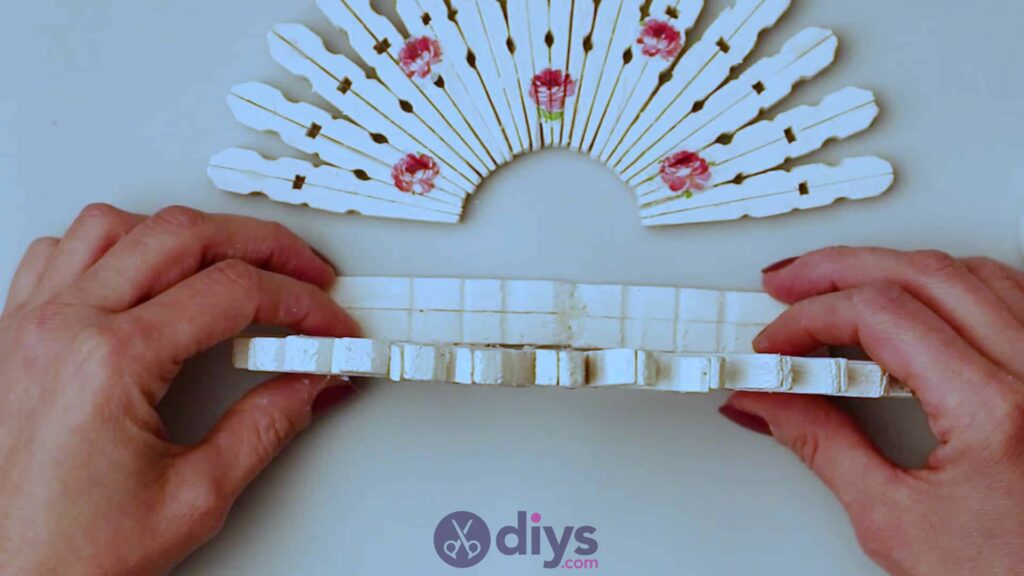
At present y'all'll built the base or flat bottom of your napkin holder with the wooden clothespin halves you lot accept left. For this part, you'll need four atypical painted wooden pieces. To beginning, hold one clothespin half and then you're looking at its ridged side like the front, and then turn that side to face up the left, and then that you now take its thin right edge facing y'all. Apply glue all along that righthand edge. Then choice up a 2d wooden one-half and stick it to the first one along itsleft sparse edge, making sure that the top and bottom ends are even with each other. Their ridged sides and flat sides should confront the same way, adjacent to each other. Prepare your new double-wide piece downwards to dry and echo that whole process with another two wooden clothespin halves.
Footstep viii:
Pick up your get-go double-wide slice one time the glue has dried and hold it horizontally, with the apartment sides facing down and the ridged sides facing upwards. Find the terminate of the paired piece that's thicker and more rounded, like the clamping terminate of the original clothespins (every bit opposed to the thinner, tapered end that was once the handles you'd pinch together to open the clothespin). Apply glue on the tip and edge of that rounded stop. At present, hold your other double-wide base of operations piece so that information technology also sits horizontally with its ridged sides upwards and its apartment sides downwardly, but turn information technology then that its rounded top end faces the i you just practical glue to. Stick the 2 together then y'all have one whole slice that'southward also doublelong, with the thinner tapered ends sticking out to the left and right. set the slice aside to dry.
Stride nine:
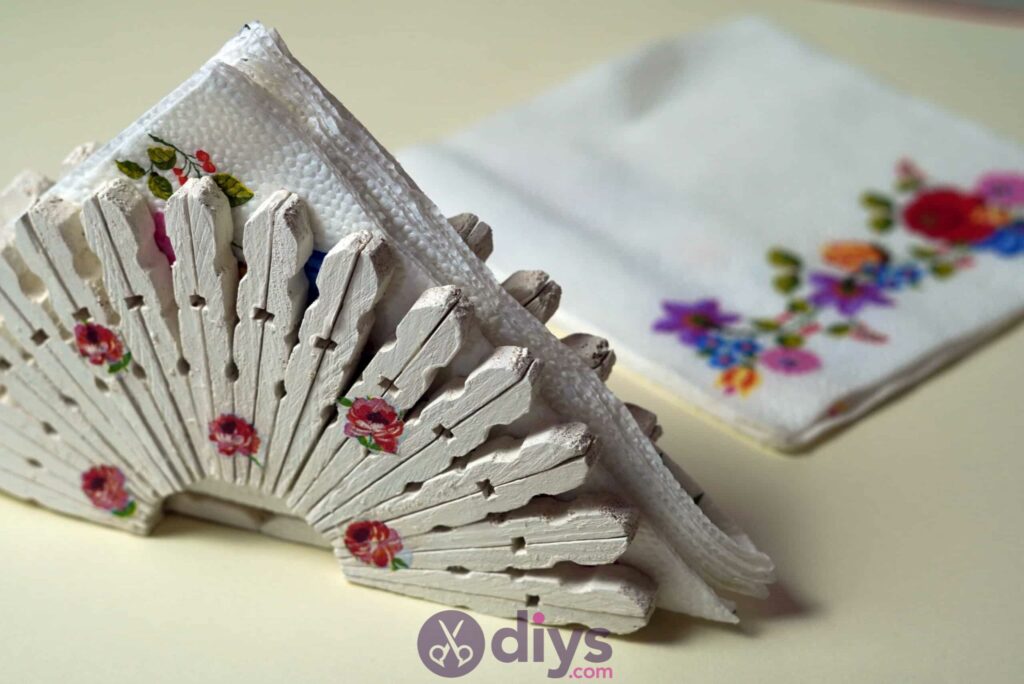
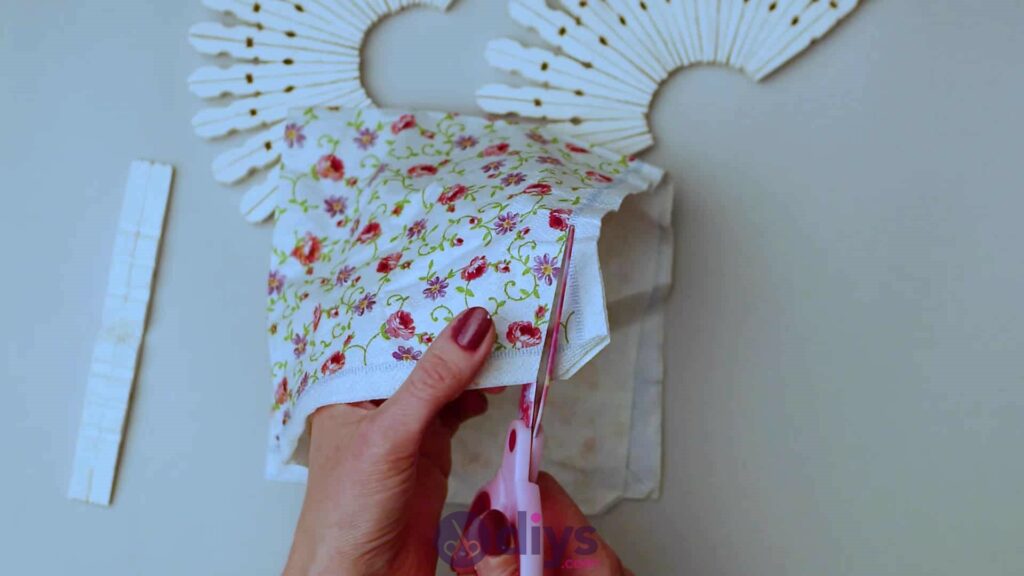
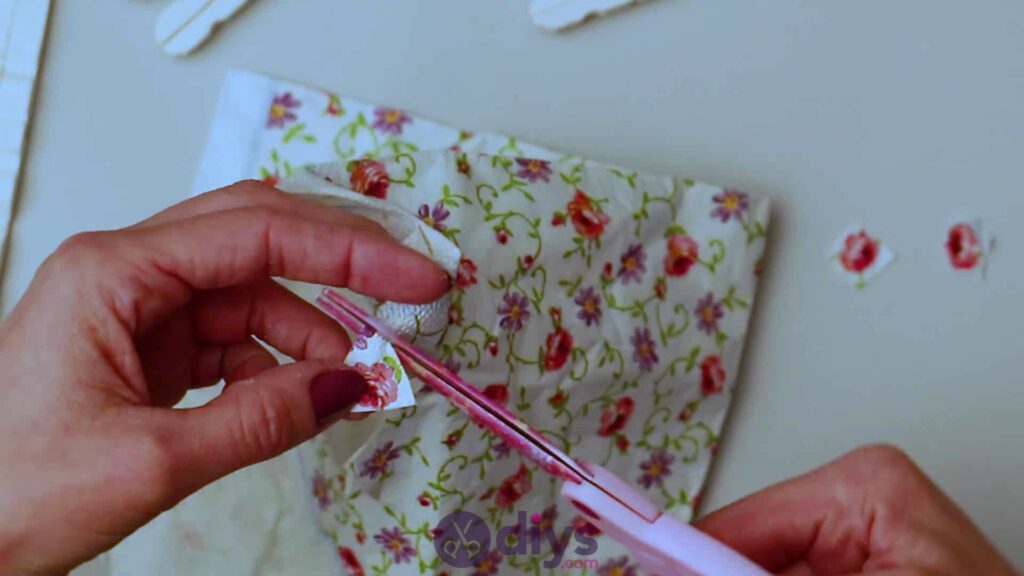
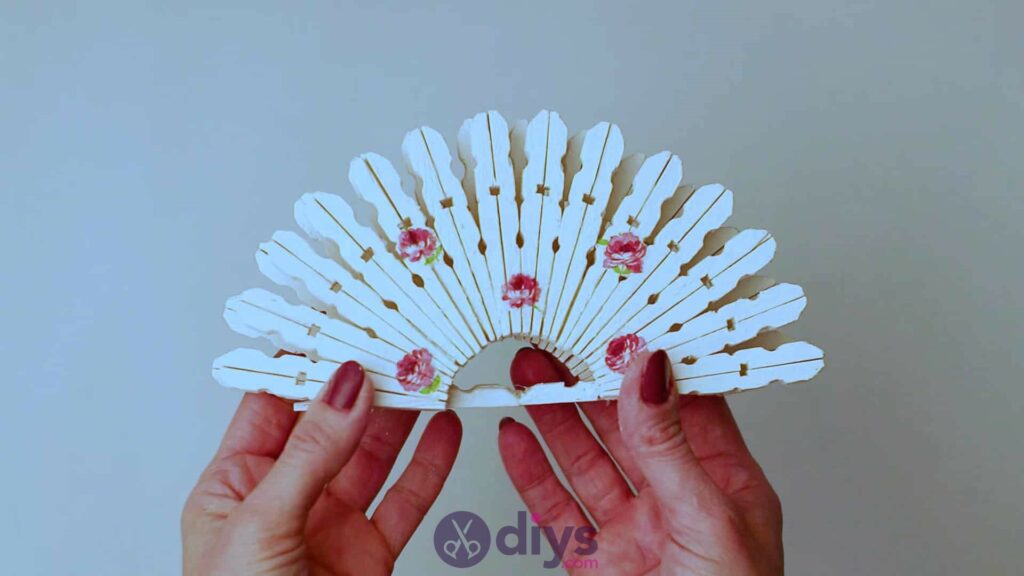
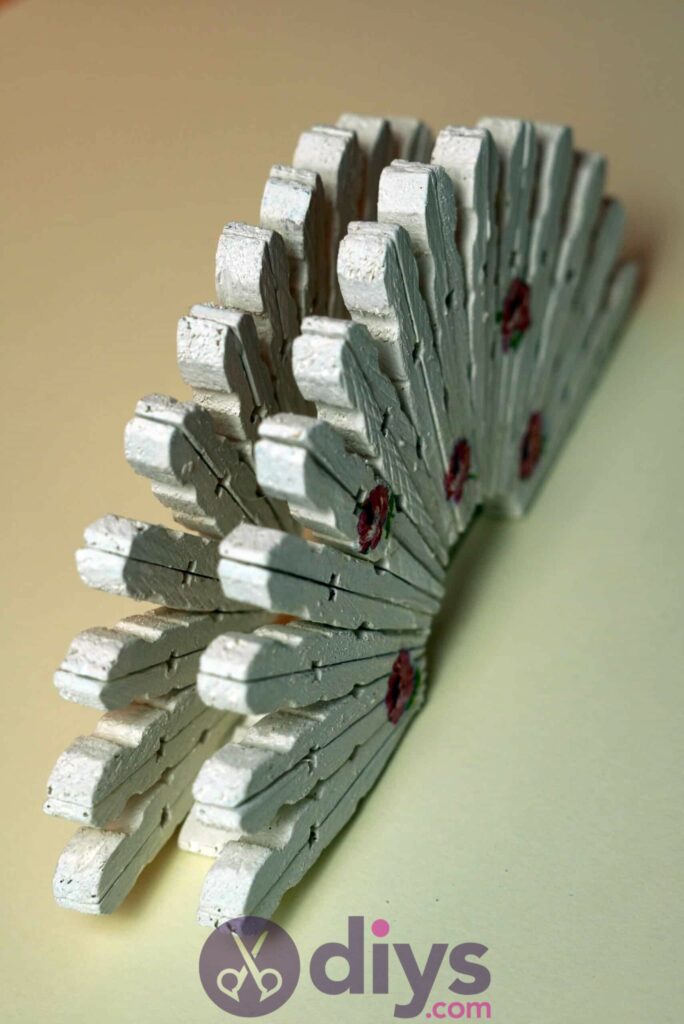
Cut out some pieces, patterns, or shapes from the printed or coloured napkins that you want to embellish your holder with! I chose a floral print napkin and so I could cutting out some of the blossoms and scatter than across the fanned sides of my napkin holder for a springlike aesthetic and some beautiful particular.
Step 10:
Utilise your decoupage mucilage (like Mod Podge) or diluted white school glue and a paintbrush to decoupage your cutout napkin shapes to the fanned sides of your napkin holder. I chose a scattered await, so I didn't take to be extremely conscientious about placement. Use a low-cal, thin patch of mucilage with your brush where you desire to stick the piece down, put it smoothly and carefully on that place, and then use the brush again to cover the napkin slice in gum, pasting it firmly into place. Make sure that you employ sparse layers of glue and a light touch on so that you don't wrinkle the piece of napkin or oversaturate it and crusade tearing. Also make sure, however, that you do cover the whole shape, its entire surface, and its edges all the mode around so that it doesn't skin upwardly later. Practice both sides and so set them aside to dry out.
Footstep 11:
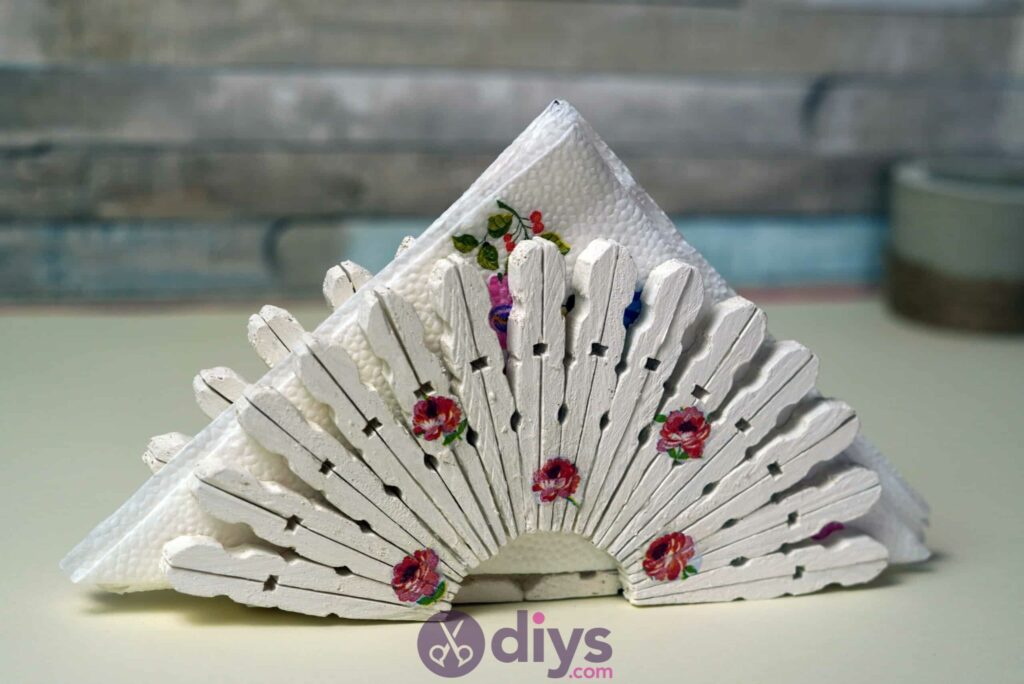
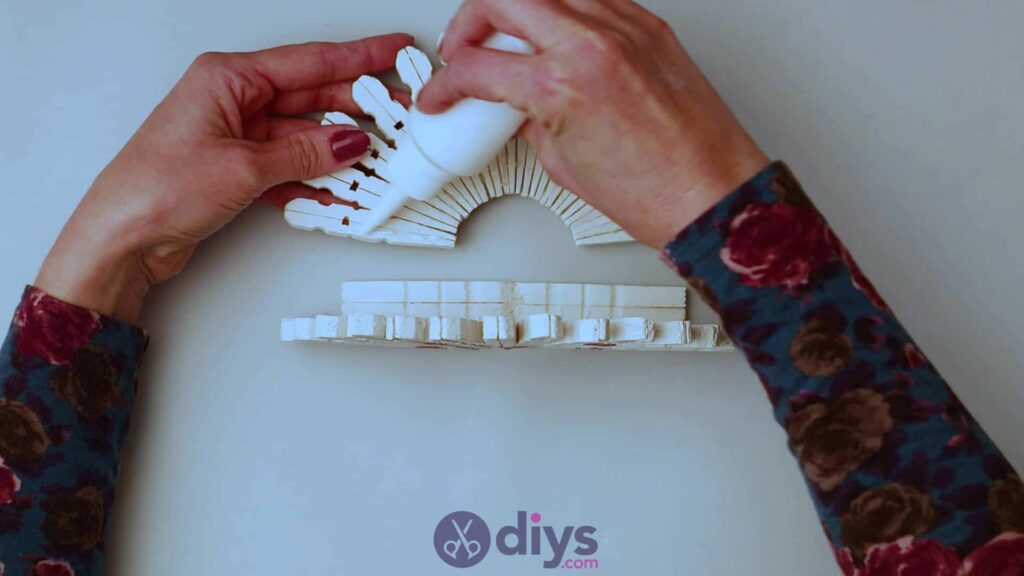
Take your bottom or base piece and plough it on its side, so the flat sides face towards you, the ridged sides confront away from you, and the side border faces upwardly. Utilize glue all along that side edge, with just a picayune bit all up and downward its length from one tapered terminate to the other. Now turn your kickoff fanned side so that the side of it that hasno decoupage on it faces the base and the border that y'all merely applied glue to. Position the pieces then that the centre of the base slice sits even with the center of the fanned side, with its finish reaching equidistant towards the edges of the side piece. Stick the two together with the flat bottoms of both pieces sitting evenly and the rounded summit edge of the fanned side extending upwards from the base piece. Apply glue on the other side of the base and along the bottom edge of the second fanned side (making sure the plain side faces in towards these other pieces and the decoupaged side faces outwards) and stick it into place in the aforementioned fashion, but on the opposite side. Prepare the whole completed piece bated to dry.
Fill up your holder with some napkins and voila! You've got yourself a finished springtime napkin holder made from clothespins. Of course, you tin can experience free to utilize this tutorial as a base technique or guide but go creative with the colours you utilise and how y'all embellish the exterior. Just in example yous'd like to try this projection out for yourself, here's a fantastic tutorial video to help you lot!
Source: https://www.diys.com/clothespin-napkin-holder/
0 Response to "DIY Clothespin Napkin Holder"
Post a Comment